The Different Ways to Install Wood Flooring
On the Installation of Wood Floors
It's no real surprise that hardwood flooring remains to be a popular flooring option. Given that the two major types of hardwood flooring products, solid and engineered hardwood floors, offer a range of features and benefits, one of the factors that most people also look at when they choose hardwood flooring is how easy it is to install.
Depending on the way that these flooring products had been manufactured and constructed, consumers can find different installation options. Gone are the days when one had to spend hours of backbreaking labor hammering and nailing wooden planks. Today, you have a range of choices when it comes to flooring products and installation methods.
How to Install Wood Floors?
In general, installing hardwood floors entails this process: first, measure the room to determine how much flooring you will need. Then, decide on the installation method you want to use. Once you have determined the type of hardwood flooring product you will be using and the installation method, it is time to purchase your materials and start the project.
Considering all the factors that go into the selection of your wood flooring product, you have three main options for installation:
- Nail-down
- Glue-down
- Floating
Nail-Down Installation of Wood Flooring
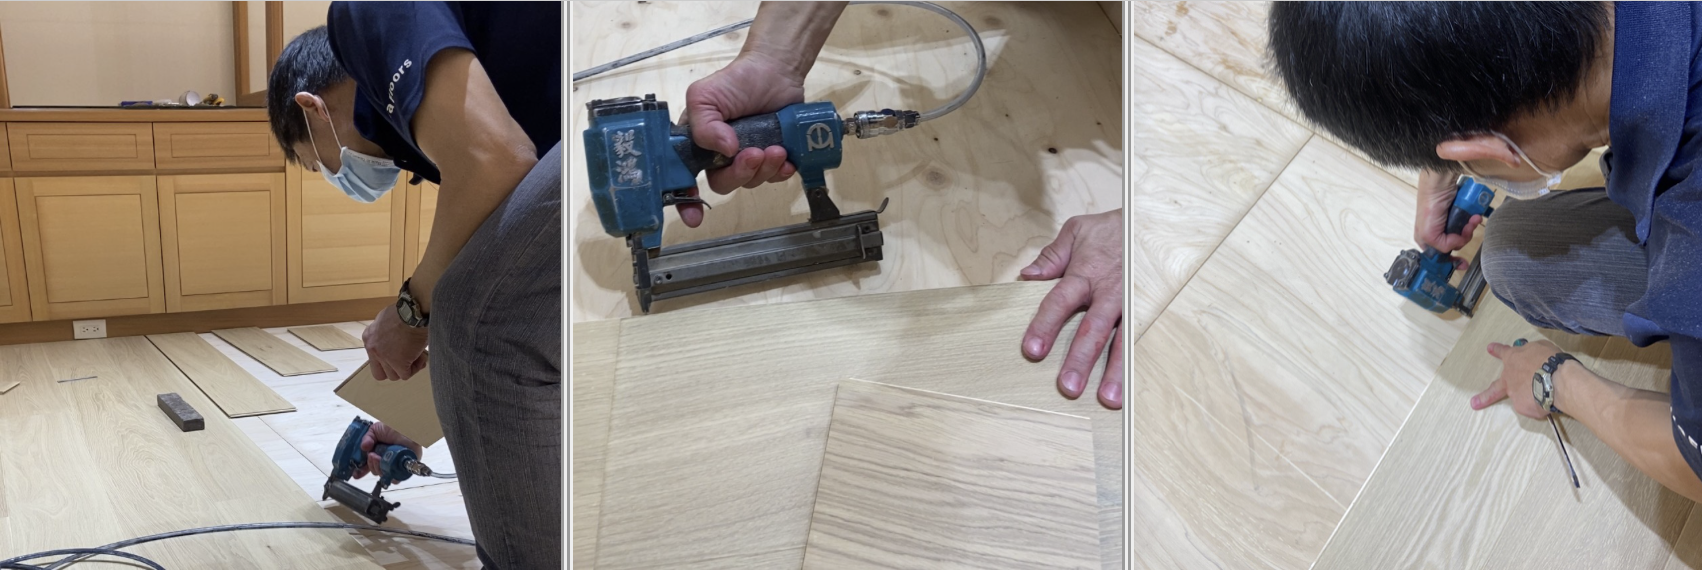
This is the traditional way of installing wood flooring and the most labor-intensive, which means that it is recommended to hire a qualified flooring specialist. It is only applicable to areas where there is a wooden subfloor, as it is not advisable to nail it into concrete or other types of surface. This makes nail-down or staple-down installation a common method for solid wood flooring, as these types of floors are thicker and prone to damage like expansion, contraction, and movement.
To do the nail-down method, you will need a hammer, nails, and a pry bar. The first step is to remove the moldings around the room and then start laying the boards in the desired location. When installing the above floorboards as a subfloor, it is ideal to lay down the planks in the opposite direction of the floorboards for greater stability. Once you have the board in place, use the hammer to drive a nail into each end of the board. Make sure that the nails are flush with the surface of the wood and then move on to the next board.
When you reach the end of a row, measure and cut the board to fit, and then use a pry bar to insert the nail into the tongue of the board. If you have more than one row of boards, make sure that the joints between the boards are staggered so that they don't line up. It is recommended to use a polyfoam underlay underneath the wood flooring for additional insulation and soundproofing.
The National Wood Flooring Association (NWFA) recommends specific measurements when blind-nailing solid strip tongue-and-groove flooring, which can be quite the precise installation practice fit for professionals.
One of the benefits of nail-down installation is that it is a very sturdy installation method. However, it can be difficult to repair or replace a board if it becomes damaged. While nail-down installation is also applicable to engineered wood floors, it is not commonly seen as practice because there are more efficient and effective ways to install engineered wood flooring, like the glue-down and floating installation methods.

Glue-Down Installation of Wood Flooring
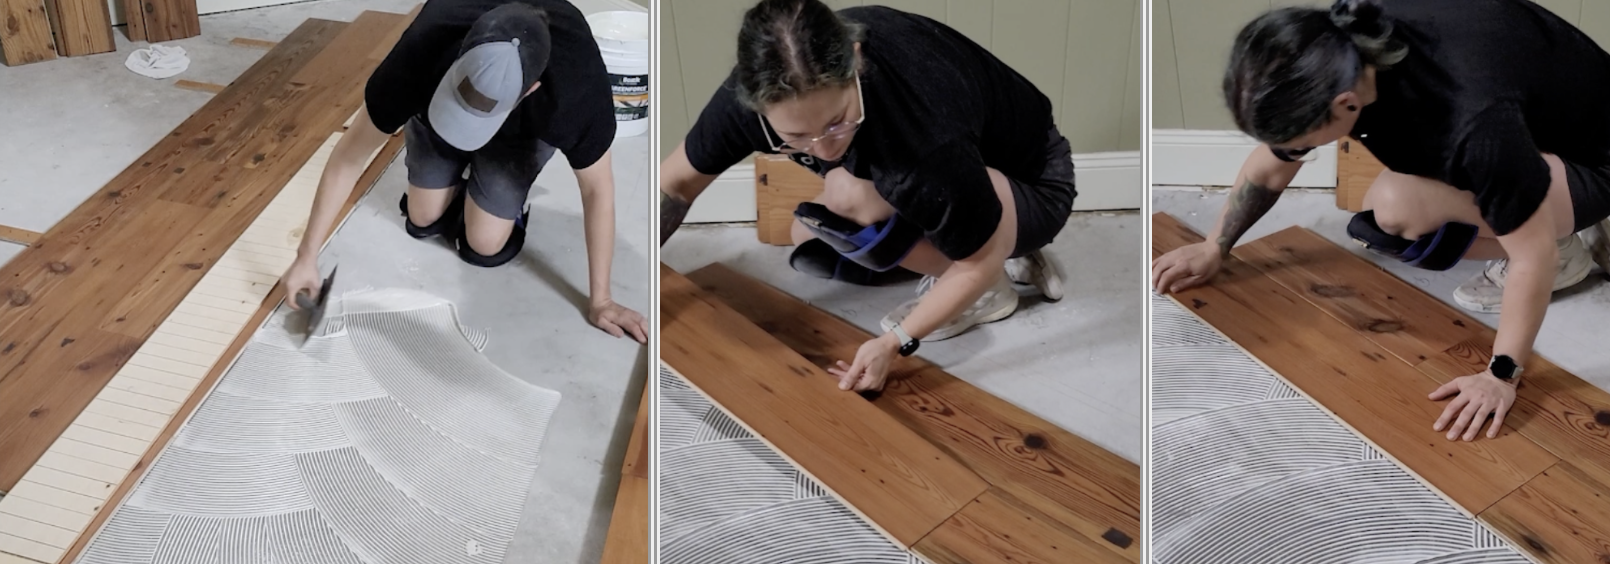
Glue-down installation is a popular alternative to nail-down installation. The important thing to consider here is the preparation of the subfloor. It can be applied to wooden or concrete subfloors, but for the latter, it’s recommended to lay a damp-proof membrane prior to the application of any adhesives. This process not only prevents moisture from penetrating the flooring, but it allows for greater bonding.
In this installation method, you will need wood glue and a trowel. The first step is to spread a thin layer of glue on the subfloor. Then, place the hardwood flooring in the desired location and use a tapping block to make sure that the boards are flush with the surface of the glue. Be careful not to put too much pressure on the blocks or you can damage the flooring.
Wait for the glue to dry, which usually takes 24 hours, and then apply a coat of finish to the floor. One of the benefits of this installation method is that it is very secure and it is not easy for the boards to move. However, it can be difficult to repair or replace a board if it becomes damaged.

Floating Installation of Wood Flooring
The floating installation method is the easiest and quickest way to install hardwood flooring. In this installation, there is no adhesive or nails needed. You simply place the boards in the desired location and walk on them to secure them in place, which makes this type of installation method the best for DIY-ers. However, it will still require precise measuring and cutting to deliver good results.
With no adhesives or nailing required, the boards are locked into each other in a floating installation, which is made possible by the way the planks have been constructed. They can either be tongue and groove or click-lock systems. It is not recommended for solid hardwood floors but is effective for engineered hardwood flooring.
One of the benefits of floating installation is that it is very easy to do and it is also very forgiving. If a board is ever damaged, it can easily be replaced. However, because there is no adhesive or nails used in this installation method, the flooring is not as secure as with the other two methods.
What Tools Do You Need to Install Hardwood Flooring?
Regardless of the installation method you choose, there are some basic tools that you will need to install your hardwood flooring:
|
Tape measure |
Ruler or level |
|
Chisel |
Safety glasses |
|
Circular saw |
Saw horses |
|
Drill |
Stapler |
|
Hammer |
Trowel |
|
Nail set |
Utility knife |
|
Pry bar |
Wire brush |
You may also need a jigsaw, miter saw, or belt sander depending on the type of hardwood flooring you are using.
When purchasing your tools, make sure to buy the best quality you can afford. The better quality tools will last longer and make the installation process much easier.
Whatever installation method you choose, make sure to read the manufacturer's instructions carefully to ensure that you are using the correct tools and techniques, should you decide to DIY.
Ua Floors: Your Hardwood Flooring Experts
Depending on your needs and preferences, these installation options can indeed influence your decision when buying hardwood flooring. This is why it is important to note how nail-down, glue-down, and floating installation methods present unique advantages.
For instance, nail-down offers a very stable and sturdy installation, while glue-down provides a permanent installation. Floating flooring, meanwhile, is the easiest to install but isn’t as secured once in place. That being said, Ua Floors – your global engineered flooring supplier – is here to provide you with a high-quality collection of beautiful and iconic hardwood floors. Feel free to let us know what installation option you prefer and we’ll get the job done.
Interested to find out more? Get in touch with us today.
